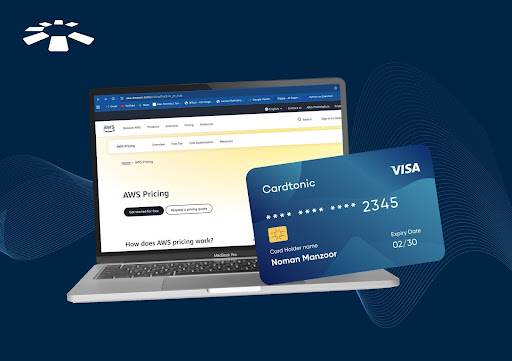
How to Pay for Amazon Web Services with a Virtual Dollar Card
For those of us who wrote New Year resolutions, have we hit the ground running, or are we still waiting for someone to “push” us? In my circle, people have already started taking steps toward their goals. That’s why I wasn’t surprised when my friend called to ask whether Cardtonic offers a payment option he could use for his Amazon Web Services (AWS) subscription.
My friend is a web designer whose goal this year is to build websites for at least 25 startups.
To achieve this, he needs uninterrupted access to AWS services like cloud storage, virtual servers, and website hosting. This access depends on having a reliable payment method.
After doing my research, I found that the Cardtonic virtual dollar card can be used to pay for Amazon Web Services subscriptions.
So, if you’re a web designer like my friend or you need access to AWS features, keep reading to learn how to pay for AWS using a virtual dollar card.
5 Steps to Pay For Amazon Web Services Using a Cardtonic Virtual Dollar Card
I told my friend that to pay for Amazon Web Services, one needs to create an Amazon Web Services account, which is different from the Amazon shopping account. Then, he has to choose between a personal and business account, select a billing method, and choose a virtual dollar card as his mode of payment. Below is a more detailed step-by-step process on how to go about it.
Step 1: Get a Virtual Dollar Card
If you want to use a virtual dollar card, you need to get a virtual dollar card, right? As for me, the only virtual dollar card I can proudly brag about is Cardtonic’s. It is cheap to get, doesn’t have hidden fees, and is acceptable on a myriad of platforms, including Amazon Web Services. This was why my friend called to ask if he could use it too.
Now, to get the Cardtonic virtual dollar card, you need to download the app or visit the website and create an account. Luckily, this takes less than a minute, and it’s not stressful at all. And if you need more details on how to get a Cardtonic virtual dollar card, you can watch this video.
Step 2: Fund Your Virtual Dollar Card
The next step is to fund your dollar card. You don’t need a domiciliary account to fund your virtual dollar card. In fact, all you need to fund your Cardtonic wallet is naira or cedis. Just ensure you put enough money that will take care of AWS charges before billing even proceeds.
Step 3: Create and Setup an Amazon Web Services Account
Of course, to use a website that offers any service, you need to create an account. While this seems straightforward, creating an Amazon Web Services account can be very stressful.
Personally, I had issues with creating a password for my already verified account. But I couldn’t log in because I needed a password to do so.
The solution to that problem is to switch off your extensions, try a new browser, reject cookies, or just contact their customer care.
If you have an account already, just skip this step and log in.
After logging in successfully, you’d need to provide details like your phone number, the type of account (personal or business), and your address. This step is necessary to complete the verification of your Amazon Web Service Account.
Step 4: Add your Virtual Dollar Card

It’s time to use your virtual dollar card. To do this, you need to choose a billing method, select cards, and input your card details: CVV, Card number, and expiry date. You’ll be charged a small fee because AWS will need to verify the card.
Step 5: Start Using Amazon Web Services
At this junction, you can proceed to start using the services. Choose the service you want, like hosting, storage, database, and the like. Ensure you select only the services that you need.
Expert Tip: A lot of people complain that they get billed a lot, and this is because they don’t know that the AWS payment structure is pay-as-you-use. This means that once you click on any service to use and you don’t cancel it, you’ll be charged for it.
Now that we’ve gone through the steps needed to set up your AWS billing system, I’m sure you use their services efficiently while Cardtonic Virtual Dollar Card helps you to handle payments.
Frequently Asked Questions on Amazon Web Services Payments
1. Which Virtual Dollar Card Can I Use to Pay for Amazon Web Services?
Cardtonic’s virtual dollar card is the best and most reliable virtual dollar card to pay for your Amazon Web Services. The dollar card does not have any hidden fees, is accepted by the platform, and is also easy to verify.
2. How Much is an Amazon Web Service Subscription?
Amazon Web Services does not have a fixed subscription. You pay for the services on a pay-as-you-go basis. This means you get charged for the active services you use.
3. Why Am I Being Charged for Amazon Web Services?
You are being charged for Amazon Web Services because, at some point, you have chosen a set of services to remain active. To stop being charged unnecessarily, ensure you cancel services that you are no longer using.
4. How Can I Cancel my AWS Subscription?
You can cancel your AWS subscription by going to the AWS Marketplace and clicking on Manage subscriptions. From there, select the subscription you want to cancel and click on it to complete the process.
Another way to cancel your subscription is by closing your root user account. However, this option doesn’t just cancel a single subscription; it closes your entire AWS account and stops all services.
5. Can I Pay for Amazon Web Services with Cryptocurrency or Paypal?
No, you cannot pay for AWS using paypal or Cryptocurrency. However, there are other alternatives like using a binance coin via a third party like Better Payment Network as a mode of payment. You can alao uss virtual cards that can be funded with cryptocurrencies.
Conclusion
We are at the junction where I have to ask you again. Are you taking the next steps like my friend and setting up your Amazon Web Services account, or are you going to give excuses this year?
The decision is in your hands, but as for me, I’ll leave you with one piece of payment advice; use Cardtonic Virtual Dollar Card for all your international payments this year.